1 Starting AlbumDIY
If you have accepted the default options in the installation process, you can start AlbumDIY by using the following method:
1)Go to Start, Programs and Visimon Ltd
2)Click AlbumDIY
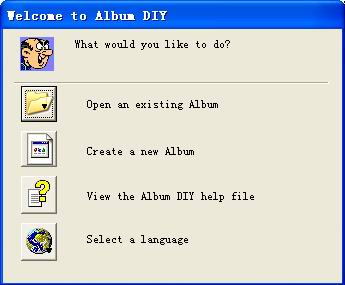
2 Welcome to AlbumDIY
|
Select a language then click the icon "Create a new Album".
3 New Album Wizard---Step1
 |
You can set cover properties such as: 3D-Like,Left border, Cover texture. You can save cover scheme to your favorite scheme.
4 New Album Wizard---Step2
 |
You can input some text and clip art on you album cover.
5 New Album Wizard---Step3
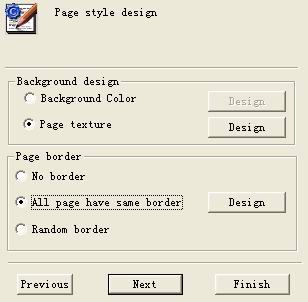 |
You can set page color, page texture and select a page border.
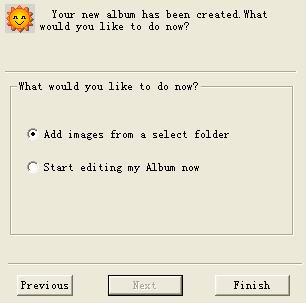 |
Please select "Add image from a select folder", then click "Finish".
6 New Album Wizard---Step4
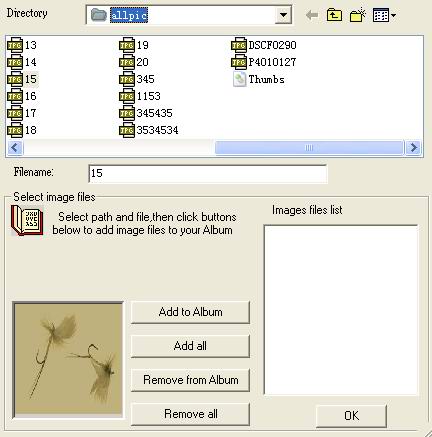 |
Please add some picture to your album then click "ok".
7 Browse your album
Your album has been created by using "New Album Wizard" , you can use menu, toolbar or hot key to browse your album now.
| Menu | Toolbar | Hot key |
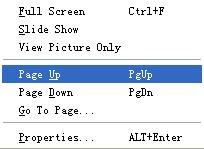 |
Ctrl+F Full Screen | |
| PgUp Page up | ||
| PgDn Page down | ||
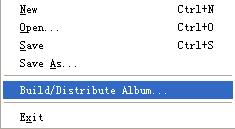
8 Build/Distribute Album
While you are creating your album it is made up of many files, a file for each image, a file explaining the layout of each page, information on your album, other attached sound files, etc. If you wanted to send these files to your friends of relatives it would be messy and confusing. By building your album you can put all of these individual files into a single (highly compressed) self-extracting album (*.exe).
| Step1:Save your album
Step2:Build/Distribute Album... |
 |